
Basic maintenance makes the equipment run efficiently. The engine air filter element is one of the parts that needs to be replaced frequently. It keeps the air entering the engine clean and prevents pollutants from damaging internal engine components. But this also means that the filter core will become increasingly dirty. The price of the filter element fluctuates between about $20 and $150, but it depends on the brand and filter type. Learn more about air filter element replacement.
What Is an Air Filter Element?
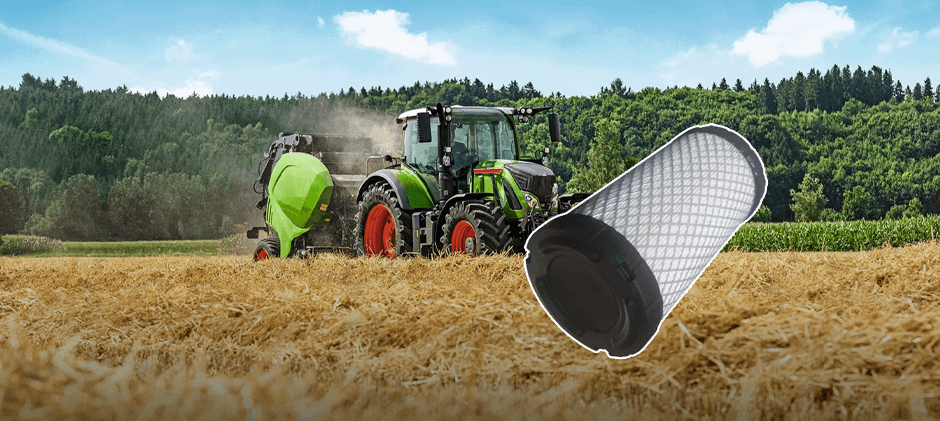
The engine air filter isn’t the full metal or plastic case on the engine side—that’s just the housing. The real working part is the filter element inside. It’s a precise screen, made of special paper or synthetic material and folded into pleats to make the surface area as large as possible. It catches harmful dirt and debris before they reach the engine’s delicate inner parts.
Off-road machines work in harsh conditions, so they need stronger filtration systems. Most excavators, loaders, bulldozers and tractors use a dual-element air filtration system:
- Primary (Outer) Element: This is the larger outer filter. It does about 99.9% of the filtering work, trapping almost all incoming dust and dirt. This is the one you’ll check and replace most often.
- Secondary (Safety/Inner) Element: This smaller filter fits inside the main one. It’s your last safety net. If the main filter gets damaged or is taken out for service, the safety filter keeps dust out of the engine’s air intake.
How to Tell If an Air Filter Element Needs Replacing?
Manufacturer guidelines give a basic rule, but you need to watch for warning signs in real use. Here’s how to tell it’s time to replace your air filter.
Air Filter Restriction Indicator
Most heavy equipment has a restriction indicator (also called a filter minder or gauge) on the air filter housing or air intake ducting. As dirt clogs the filter, vacuum pressure in the intake goes up—and the indicator measures this pressure.
It could be a simple pop-up button, a color-changing gauge (green to red), or an electronic sensor that sends a warning to the cab’s dashboard. When the indicator hits the red zone or triggers a warning, the filter is so clogged it restricts airflow and reduces performance. Time to replace the primary element. Don’t guess—follow the gauge.
Obvious Drop in Engine Power
An engine is basically a large air pump. It needs plenty of clean air to burn fuel efficiently, and a clogged filter cuts off that air supply. If your machine feels slow, struggles when under load, or responds sluggishly, a blocked air filter is the first thing to check.
More Black Smoke from the Exhaust
Black smoke is a classic sign of an unbalanced air-to-fuel ratio. A clogged filter stops the engine from getting enough air, making it run rich—meaning there’s too much fuel for the available air. This unburnt fuel comes out the exhaust as thick black smoke, wasting fuel and showing the engine is having serious breathing issues.
Visual Inspection
If your machine doesn’t have a restriction indicator, a visual check is your next best choice. Carefully take the primary element out of its housing (we’ll explain how in the next section).
Look at the filter pleats. Are they packed with dirt, dust and debris? A little dirt on the filter is normal, but a heavily caked one needs replacing. A good test: Hold a shop light inside the element in a dark area. If you can barely see light shining through the pleats from the outside, the filter is too clogged to work properly.
Step-by-Step DIY Air Filter Element Replacement
This job is easy to do, but you’ve got to pay close attention to the small details.
Tools You’ll Need
- Safety glasses and gloves
- Clean, lint-free rags
- Socket set or wrenches (if you need them for the housing clamps)
- New primary filter element (the right size) and a secondary one if needed
Step-by-Step Process
Park on flat ground and turn the engine off
Park the machine in a safe, flat spot—ideally away from blowing dust. Lower all attachments to the ground, set the parking brake, and shut off the engine. Let the engine cool down completely.
Find and clean the air filter housing
Locate the air filter assembly—it’s usually a big cylindrical canister hooked up to the engine’s air intake. Wipe down the entire outside of the housing and the area around it with a clean rag before you open anything. This keeps dirt from falling into the intake system when you take it apart.
Open the housing
Undo the clips or loosen the bolts that hold the housing’s end cap on. These are almost always big wing nuts or metal latches—you can usually work them by hand or with a simple tool. Take the end cap off carefully and set it aside.
Take out the primary element
You’ll see the big primary element right away. Twist it gently and pull it straight out of the housing. Don’t bang it against the sides—this can shake loose the dirt inside.
Check the safety element (DON’T REMOVE it unless you’re replacing it)
With the primary element out, you’ll see the smaller safety element inside. Leave it alone (don’t touch or take it out) unless you’re replacing it too. It’s there to protect the engine while the primary filter is out. Give it a quick visual check for dust or damage. If you see dirt on it, that’s a red flag—the primary filter failed, and you need to replace both right away.
Clean the inside of the housing
Grab a clean rag, dampen it a little (don’t soak it), and wipe the inside of the housing clean—wipe from the inside out. Pay extra attention to the sealing surface where the filter touches the housing. Make sure there’s no dust or grit left inside at all. Never use compressed air to blow out the housing—this will blast dust straight into the engine intake.
Put in the new primary element
Take your new primary element and slide it carefully into the housing. Push it in firmly until it sits tight against the back of the housing. Make sure it’s straight and seated properly—this creates a perfect seal.
Replace the safety element (if you need to)
If it’s time to change the safety element (normally after every 3-5 primary filter changes, or if it’s dirty), take the old one out carefully once the housing is clean. Pop the new one in right away, make sure it’s seated correctly, then install the new primary element.
Put the end cap back on
Check the end cap for its rubber seal—make sure the seal is clean and in good shape. Place the cap back on the housing and line it up correctly. Fasten the latches or tighten the bolts evenly, so the seal is tight all the way around.
Reset the restriction indicator
If your machine has a mechanical restriction indicator, press the reset button on the end of it. You’re all set to go now.
How Often Should You Change Your Air Filter Element?
The right time to replace the filter depends on three things:
- Manufacturer’s Recommendation: Your owner’s manual will give a basic interval in service hours (like “every 500 hours”).
- Restriction Indicator: This tells you the filter’s real condition based on how you use the machine. Always go by the indicator, not just a fixed hour schedule.
- Working Environment: A machine used in a rock quarry, demolition site, or dry, dusty field needs filter changes way more often than one on a grassy landscaping job. In super dusty conditions, you might even need to check the filter every day.
Common Mistakes to Avoid
Here are the most common (and expensive) mistakes we see.
- Blowing a Filter with Compressed Air: It’s tempting to clean a dirty filter with an air gun to save money. Don’t do it. High-pressure air can damage the filter media in ways you can’t see. Tiny tears let harmful dust pass straight into the engine. Air also pushes fine dust deeper into the pleats, making the filter worse. Replace the filter. Never “clean” it with compressed air.
- Ignoring the Safety Element: The safety element is not optional. If you skip it, you lose your backup protection. If the primary filter fails, there’s nothing left to stop dirt from entering the engine. Think of the safety element as cheap insurance.
- Installing a Filter in a Dirty Housing: Skipping housing cleanup saves a few minutes, but it can cost a lot later. Any dirt left inside will be pulled straight into the engine the moment you start it. Always wipe the housing clean first.
- Using a Low-Quality or Wrong Filter: Poor-quality filters may not seal correctly. Some have uneven filter media that lets dirt slip through. Using the wrong part is even worse—it simply won’t work. Always use a high-quality filter that fits your machine properly.
Conclusion
No matter what machine or brand you run, FridayParts has the air filter you need. We stock both premium and cost-effective filters and filter elements for major equipment brands, all ready to ship.