
Spring is coming. It signals the arrival of a busy planting season. In the field, every hour counts. A planter in its tip-top condition can ensure a smoother spring planting operation and a more considerable yield potential. To make that happen, pre-season planter maintenance is indispensable.
Why Spring Planter Maintenance Is Critical for Yield
Pre-season planter maintenance directly impacts your bottom line. Planting accuracy determines the crop emergence. A minor wear on planter parts can affect seed depth consistency, spacing accuracy and overall row unit performance. Seeds are likely to compete for nutrients, moisture, and sunlight when seed placement is wrong. It will hinder the seeds from growing and ultimately reduce the yield potential. Also, downtime during peak planting season can be extremely costly. Delays, increased labor costs and missed planting opportunities can eat up your profitability. Preseason maintenance can help you identify and replace worn planter parts, ensuring your machine operates at its peak performance.
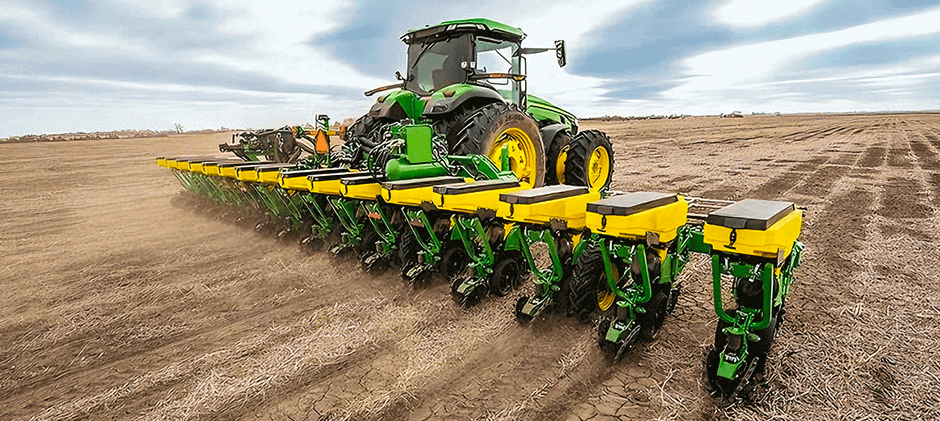
Key Planter Parts to Check Before Spring
Seed Meter
The seed meter directly controls seed spacing and singulation. Worn components can cause skips, doubles, and uneven emergence.
Seed Discs/Plates: Check for cracks, warped surfaces or enlarged holes.
Brushes: Inspect for fraying, stiffness or uneven wear.
Singulators: Look for edge wear, grooves or deformation.
Vacuum Seals: Check for cracks or loss of flexibility.
Opener Discs & Double Disc Assemblies
Disc openers are easy to wear out because they are direct ground-engaging parts. Worn or misaligned discs can lead to shallow planting, sidewall compaction or uneven stands.
Disc Openers: Measure the diameter and check for excessive edge wear.
Double Disc Assemblies: Check the contact area between the two discs.
Disc Bearings: Check disc bearings for smooth rotation and excessive play.
Scrapers: Inspect scrapers for bending or excessive wear.
Gauge Wheels & Closing Wheels
Gauge wheels control planting depth, while closing wheels ensure proper seed‑to‑soil contact after the seed is placed. Worn or improperly adjusted wheels can affect depth consistency and increase soil compaction, leading to uneven emergence.
Gauge Wheels: Check for worn edges, cracks, or loss of round shape.
Gauge Wheel Arms & Bushings: Inspect for looseness or side‑to‑side movement.
Closing Wheels: Look for worn rubber, bent spikes, or uneven surfaces.
Wheel bearings: Spin the wheels by hand and check for noise, resistance, or wobbling.
Planter Chains & Drive Systems
The drive system ensures accurate seed spacing and smooth operation. Mechanical wear in chains or bearings can reduce transmission accuracy and cause inconsistent planting performance.
Chains: Check for chain stretch, rust, or stiff links.
Sprockets: Inspect for sharp or hooked teeth.
Drive Shafts: Check alignment and look for bending or vibration.
Bearings: Look for grinding sounds, excessive play or resistance during rotation.
When Should You Replace Planter Wear Parts
In pre-season inspection, planter wear parts should be replaced when they reach specific wear thresholds. It can ensure consistent seed depth and spacing.
Seed Meter
Replace seed meter components when:
–seed disc hole becomes enlarged or grooves are visible;
–brushes are feathered or no longer maintain seed control;
–vacuum seals lose flexibility;
Remember to calibrate meters after the replacement.
Disc Openers
Replace your disc openers when:
–your blades are badly worn, e.g., 15-inch blades worn to 14.5 inches or less in diameter;
–proper 1-2 inch blade contact cannot be achieved;
To maintain proper V-shaped furrow formation, you’d better replace in matched pairs.
Gauge Wheel
Replace your gauge wheel when:
–the wheels fail to maintain consistent contact with disc blades;
–the rubber is worn smooth of out of round;
–excessive side play affects depth control;
The ideal blade contact should be about 1-1.5 inches.
Drive System Parts
Replace the drive system parts when:
–chains’ stretch exceeds tolerance or frequent retensioning is required;
–bearings show grinding noise, heat buildup or excessive play;
For high-acreage operations, annual replacement is recommended.
Final Pre‑Season Planter Maintenance: A Step-by-Step Guide
Step 1: Thorough cleaning
A thorough cleaning is critical for pre-season planter maintenance. Even a small amount of dust, seed treatment residue and debris from last planting season can bring about undesirable issues like singulation throwing off, interference with vacuum pressure or inaccurate population readings during the fieldwork. Clean the following components:
Seed meters and meter housing
Seed hoppers and seed tubes
Brush belts for high-speed planters
Sensors and optical manifolds
Bulk-fill hoses and manifolds
Gauge wheels and closing wheels
Step 2: Inspect and replace the worn parts
After cleaning, inspect all critical wear components and replace parts that exceed wear thresholds. Focus on:
Disc openers and blade diameter
Seed tube guards
Gauge wheels and bushings
Seed meter discs, brushes, and seals
Chains, sprockets, and bearings
Step 3: Perform calibration and field testing before planting
Before you enter the field, you must reconfirm the following things.
Calibrate seed meters and verify singulation
Check vacuum pressure and monitor readings
Conduct a short field test
Confirm seed depth, spacing, and row alignment
Listen for a weird vibration or noise
Conclusion
Pre-season planter maintenance is the most worthwhile investment. Following the checklist can ensure a smooth planting season and minimize costly downtime. FridayParts offers a comprehensive selection of planter parts, including bearings, seed sensors, disc openers and more. Have your planter parts ready. Don’t wait until your planter breaks down. Contact us with your model serial number and part number. Our expert team is ready to help you with your planting parts needs.
You Might Also Like
When to Start Planting for Spring?
Plow vs Tiller: Which Is Better for Spring Planting?