

You can test a camshaft position sensor with a multimeter. The testing steps depend on the type of sensor you have. Most are either two-wire (magnetic) or three-wire (Hall effect). Follow the steps below to test yours.
What Is a Camshaft Position Sensor?
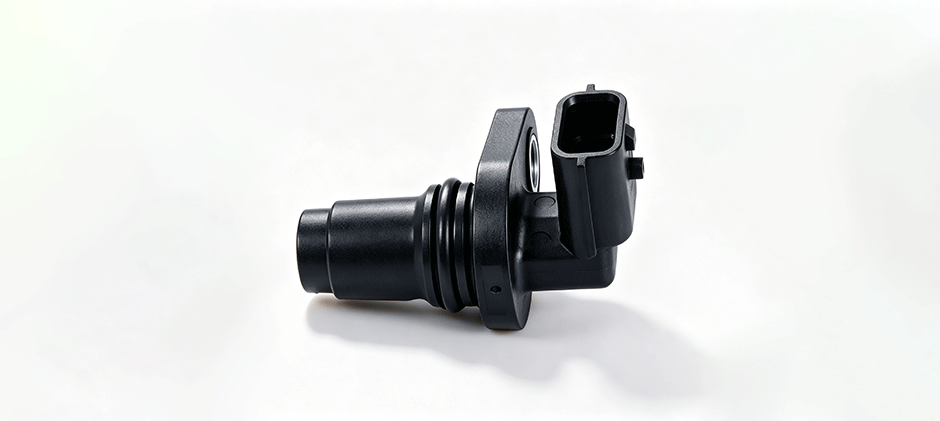
The camshaft position sensor (CMP) tells the ECM the exact rotational position and speed of the engine’s camshaft.
In a diesel engine, this information is vital. The camshaft controls the opening and closing of the engine’s intake and exhaust valves. The ECM needs to know the camshaft’s precise position to perfectly time the fuel injection events. By comparing the camshaft sensor’s signal with the signal from the crankshaft position sensor (CKP), the ECM knows exactly which cylinder is on its compression stroke and ready for fuel. This precise timing is crucial for engine power, efficiency, and smooth operation. Most sensors on off-road machinery are one of two types:
- Hall-Effect Sensor (3-wire): This type uses a small magnetic field. As a notched “reluctor” wheel on the end of the camshaft spins past it, the teeth disrupt the field, and the sensor generates a clean, digital square wave signal (on/off) that the ECM can easily read.
- Variable Reluctance Sensor (2-wire): This is a simpler magnetic pickup. It generates its own AC voltage signal as the metal teeth of the reluctor wheel pass by it. The faster the engine spins, the higher the voltage and frequency of the signal.
Without a good signal from the camshaft position sensor, the ECM is essentially flying blind, guessing when to inject fuel. This transition from precise control to guesswork is where performance problems begin.
Bad Camshaft Position Sensor Symptoms
A failing camshaft sensor almost always shows clear symptoms. Since it controls fuel timing and engine sync, bad sensor readings will mess up how your machine runs. These are the most common signs:
- Hard start or no start: If the ECM gets no signal from the CMP sensor, it can’t tell the injectors when to fire. The engine will crank normally but won’t start, or it takes a lot longer to finally fire up.
- Random stalling: The engine may start fine, but stall out of nowhere — at idle or while working under load. This happens when the sensor signal cuts in and out, so the ECM loses engine timing.
- Rough idle and misfires: An unstable sensor signal throws off fuel injection timing. One or more cylinders will run wrong, causing shaking, rough idle, and engine stumbling.
- Loss of power/engine derate: Most modern diesel engines go into limp mode when the CMP sensor fails. The ECM cuts power to protect the engine, so your machine feels weak and unresponsive even at full throttle.
- Worse fuel economy: Incorrect timing makes the engine burn fuel inefficiently. You’ll burn more fuel than normal, which raises your operating costs.
- Check engine light on: A bad camshaft sensor will nearly always trigger fault codes and turn on the dash warning light. The most common codes are P0340 and P0341.
What Causes the Camshaft Sensor to Fail?
Camshaft position sensors fail for a few common reasons. Knowing these causes helps you avoid future problems on your equipment.
- Heat damage: The sensor sits right on the engine and takes constant extreme heat. After long working hours, the high heat burns out its internal electronics or cracks the plastic housing.
- Heavy vibration: Diesel engines and rough job-site terrain create nonstop strong vibration. This shakes loose the sensor’s internal parts and damages its wiring over time.
- Dirt and fluid contamination: Oil, diesel, hydraulic fluid, dust and grime get into the sensor connector. This causes corrosion and a bad electrical connection. For magnetic sensors, metal shavings stuck on the sensor tip will also mess up and weaken its signal.
- Wiring harness problems: The sensor wires are usually the weakest part. They rub against engine parts and get chafed, turn brittle from heat, or develop corroded pins. This causes open or short circuits.
- Internal electronic wear-out: Just like any electronic part, the sensor can fail from old age or factory defects. Its internal circuits can break or short out, resulting in total signal loss.
How to Test the Camshaft Position Sensor with a Multimeter?
Testing a camshaft sensor is all about ruling out other issues. Before you buy a new one, you can do simple multimeter tests to confirm if the sensor is actually bad. Important note: Always check your machine’s service manual first. It shows the exact sensor location, wire colors, and correct voltage/resistance specs for your model.
Step 1: Prep & Safety
Park the machine on flat ground, set the parking brake and block the wheels. Wear safety glasses and gloves. Just have your multimeter and service manual ready before you start.
Step 2: Find and Visually Inspect the Sensor
Use the manual to locate the CMP sensor. It’s usually on the engine front near the cam gear, on the timing cover, or on the cylinder head.
Do a full visual check:
- Look for cracks or physical damage on the sensor body
- Check wires for rubbing damage, melting or breaks
- Unplug the connector, clean and check both sides of the pins
- Corrosion, oil buildup or dirty pins are the most common cause of sensor issues.
Step 3: Check sensor type (2-wire or 3-wire)
Just count the wires on the connector — the test method is different for each:
- 3-wire (Hall-Effect): Has power, ground and signal wire
- 2-wire (Variable Reluctance): No power supply, both wires are for AC signal output
Testing a 3-Wire (Hall-Effect) Sensor
- Test reference voltage: Leave the sensor plugged in. Turn the key ON, but don’t start the engine. Set your multimeter to DC Volts. Use back probes to test the power and ground wires — check your manual for the correct wire positions. You should get a steady voltage, usually 5V or 12V. If you get 0V, the issue is with the wiring or ECM, not the sensor itself.
- Test ground connection: Disconnect the battery and unplug the sensor connector. Switch your multimeter to continuity mode. Put one probe on the ground pin of the harness, and the other on clean bare metal of the engine or frame. The meter should beep or show near 0 ohms, which means the ground is good.
- Test sensor signal (final confirm test): Plug everything back up. Set the meter to DC Volts, then back-probe the signal wire and ground wire. Have someone crank the engine for you. You’ll see the voltage switch rapidly while cranking — usually bouncing between 0V and 5V, or holding around 2.5V average. If the voltage stays stuck at 0V or full reference voltage the whole time, the sensor is faulty.
Testing a 2-Wire (Variable Reluctance) Sensor
Test internal resistance: Disconnect the battery and unplug the sensor. Set the multimeter to Ohms. Test the two pins directly on the sensor. Compare your reading to the specs in your service manual (most sit between 800–1500 ohms):
- Infinite resistance (OL) = internal coil broken, bad sensor
- 0 resistance = internal coil shorted, bad sensor
Test AC signal output: Plug the sensor back in. Set your multimeter to AC Volts, and back-probe the two sensor wires. Have someone crank the engine. You should get a small AC voltage reading (about 0.5V–1.5V), and the voltage will rise if cranking speed increases. If you get no AC voltage at all while cranking, the sensor is dead.
To Conclude
Start with a quick visual check, then test the sensor with a multimeter. Don’t forget to check the wiring and connector too. A damaged wire or corroded connector can cause the same problems as a bad sensor. FridayParts.com makes it easy to find high-quality replacement parts for your machine, including a camshaft position sensor.
