

Warm air blowing from your excavator’s AC? A refrigerant leak is the most likely cause. Fixing it the right way means finding the leak and repairing the faulty part—not just recharging and calling it done. Topping off the system doesn’t address the root problem, and a small leak left unchecked can take out the compressor. This guide shows you how to fix a refrigerant leak properly—saving time, money, and getting your AC back to blowing cold.
How to Pinpoint the Leak?
Before any repair can happen, you need to confirm there is a leak and find exactly where it is.
Common Signs That Point to a Leak
These symptoms suggest refrigerant is escaping. If you notice several of them, you are likely dealing with a leak:
- Cabin air is no longer cold – Vent temperature is noticeably higher than normal.
- Cooling drops during long work cycles – The AC works okay at first, then gradually loses cooling as the day goes on.
- Compressor cycles on and off too frequently – The low-pressure switch keeps triggering, causing short-cycling.
- Oily residue around fittings, hoses, or the compressor – Refrigerant carries oil, so a leak leaves an oily trail.
- Frost or ice on parts of the system – Low refrigerant causes the evaporator to get abnormally cold in spots.
Where Leaks Hide Most Often
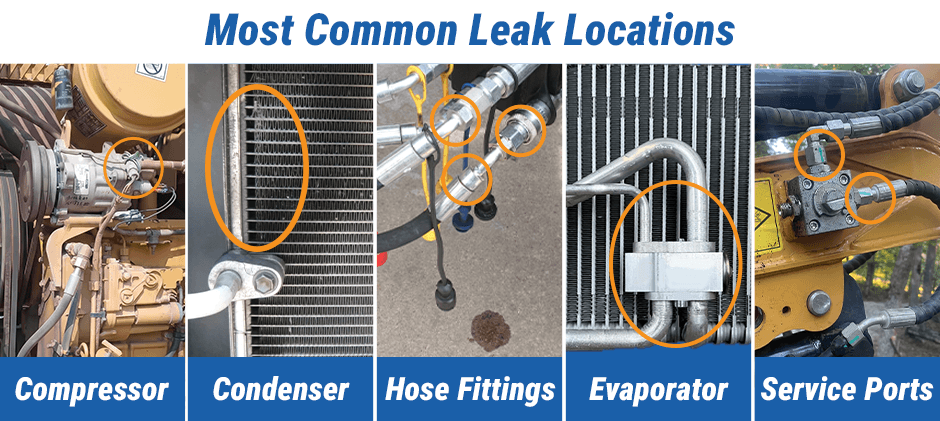
In excavators, vibration, debris, and long idle periods make certain parts more vulnerable. Here are the most common failure points:
| Rank | Location | Why It Fails |
|---|---|---|
| 1 | Hose connections and O-rings | Vibration wears down seals over time |
| 2 | Compressor shaft seal | Extended idle periods dry out the seal |
| 3 | Condenser | Mounted at the front—vulnerable to rocks and debris |
| 4 | Service ports/valves | Valve cores age or aren’t tightened properly |
| 5 | Metal line rubbing points | Lines rub against the frame and wear through |
| 6 | Flexible hoses | Rubber hardens and cracks under heat and oil exposure |
| 7 | Evaporator | Corrosion from cab chemicals—and it is the hardest to access |
In high-vibration, high-dust environments, fittings, hoses, and the condenser often fail long before the rest of the system. That is not a quality issue—it is simply the nature of the work.
Diagnostic Methods You Can Use
| Method | How It Works | Can You Do It? |
|---|---|---|
| Visual inspection | Look for oily residue, wet spots, or physical damage along all lines | Yes—no tools needed |
| Soap-and-water test | Mix dish soap with water, apply to joints—bubbles mean a leak | Yes—simple and effective |
| UV dye | Inject dye, run the system, scan with UV light—leak glows bright yellow-green | Yes, with the right kit |
| Electronic leak detector | Professional tool that “sniffs” refrigerant gas at ppm levels | Usually done by a service provider |
“A proper diagnosis is the foundation of any lasting repair. Without finding the exact leak point, you are just guessing—and guessing costs time and money.”
The UV dye method is particularly useful for excavators because the system is exposed and easy to inspect with a UV leak detection light. If you are taking the machine to a shop, ask which method they used to find the leak. A technician who cannot tell you probably did not do a thorough job. Knowing how to fix a refrigerant leak starts with knowing exactly where the leak is.
How to Fix a Refrigerant Leak Step by Step?
A real repair follows a specific sequence. If any step is skipped, the repair is incomplete.
Step 1 – Confirm and Locate the Exact Leak
Before touching any component, verify the leak exists and pinpoint its exact location. Use the diagnostic methods above—visual, soap water, UV dye, or electronic detector. There may be multiple leaks, so do not stop at the first one you find.
Step 2 – Recover the Remaining Refrigerant
A recovery machine pulls all remaining refrigerant into a certified cylinder. Never vent refrigerant directly into the atmosphere—it is illegal and environmentally destructive. The amount recovered also tells you how severe the leak is.
Step 3 – Replace or Repair the Failed Component
Depending on the leak, the repair could be:
- O-ring or seal – Remove the old seal, clean the surface, apply oil, and install a new AC-compatible seal.
- Metal line – Silver-braze the crack or replace the entire section.
- Condenser – Minor damage can be welded; major damage requires full replacement.
- Evaporator – Often requires disassembling the cab—this is labor-intensive.
- Compressor shaft seal – Replace the seal kit (the compressor must be removed).
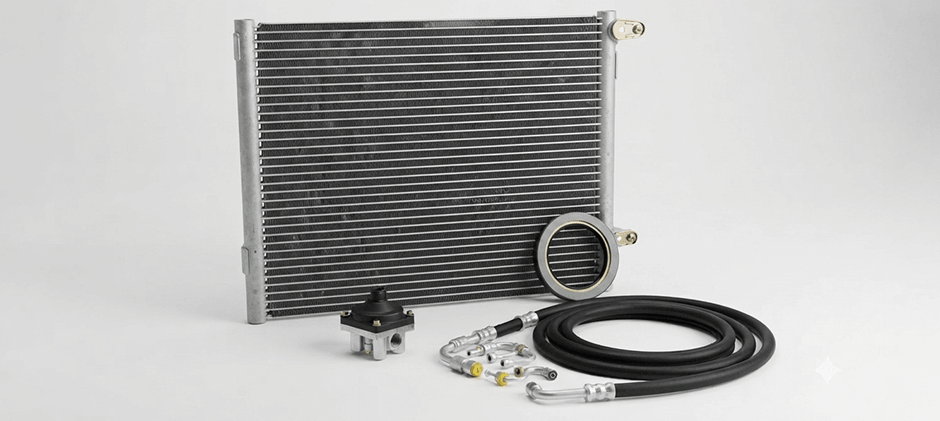
When replacing seals or rebuilding components, you will need compressor oil to ensure proper lubrication. A receiver drier should also be replaced any time the system is opened to remove moisture.
Step 4 – Evacuate and Test the System
Pull a deep vacuum with a vacuum pump—minimum 30 minutes at 500 microns or lower. This step is critical because moisture in the system reacts with refrigerant and oil to form acid, which eats components from the inside. After vacuuming, charge with dry nitrogen and monitor pressure for 15–30 minutes to confirm there are no more leaks. The system should hold pressure without dropping.
Step 5 – Recharge by Weight, Not Pressure
Use an electronic scale to add the exact weight of refrigerant specified by the manufacturer. Add the correct amount of compressor oil at the same time—leaks carry oil out with the refrigerant. Pressure changes with ambient temperature; only weight is a fixed, reliable standard. If a technician says “just fill it until the gauge reads XXX” without weighing it, find someone else.
Repair or Replace – How to Decide?
| When Repair Makes Sense | When Replacement Is Better |
|---|---|
| Single leaking fitting or O-ring | Corroded condenser—fix one spot, another will fail soon |
| Service valve leak | Multiple aged hoses—replace all at once |
| One damaged hose section | Evaporator core failure—access labor is too expensive for a patch |
| Clear and accessible leak point | Repeated leaks on the same component |
| Compressor contamination—debris means replacement is more reliable |
If the repair costs more than half of a replacement, and the component is older, replacing it is usually the smarter long-term choice.
What Happens If You Don’t Fix It?
Skipping the repair does not save money—it just makes the eventual bill much bigger.
| Stage | What Is Happening |
|---|---|
| Early | Cooling gets weaker. Compressor short-cycles as the low-pressure switch trips repeatedly. |
| Middle | Refrigerant loss means less oil circulates back to the compressor. It runs hot and under-lubricated. |
| Late | Compressor seizes (“locks up”). Metal debris contaminates the entire system—condenser, expansion valve, evaporator all get damaged. |
| Final result | Repair cost jumps to 3–5 times the cost of fixing the original leak. |
“One cylinder of refrigerant costs very little. One compressor costs a lot. The math is simple.”
Refrigerant and oil circulate together, so when refrigerant leaks out, oil leaves with it. Low refrigerant means the compressor is not getting enough oil, which is the most common reason for compressor failure. That is why learning how to fix a refrigerant leak early matters so much.
Preventing the Next Leak
A few simple habits can save you from going through this again:
- Inspect hoses and fittings during routine service – A quick visual check catches problems early.
- Keep the condenser area clean – Clear mud, dust, and debris regularly to maintain airflow and prevent corrosion.
- Check rubbing points and loose clamps – Vibration loosens clamps over time; tighten them before they cause wear.
- Run the AC at least once a week – Even in cool weather, this keeps the compressor shaft seal lubricated.
- Do not ignore small performance drops – A slight loss of cooling is often the first sign of a developing leak.
Final Thoughts
The most important thing to remember is this: any service that recharges your system without locating and fixing the leak is not a real repair. It is just a delay—and delays cost compressors. When your AC system needs attention, use quality replacement components like condensers and receiver driers to get the job done right. For a wide selection of reliable aftermarket parts, visit FridayParts—we offer high-quality AC components at competitive prices for a broad range of equipment.
